1. Set up Medical ID
Setting up a medical ID on your iPhone can come in handy during a medical emergency. It ensures you receive prompt and appropriate medical attention. For example, suppose you cannot communicate during an emergency. In that case, your Medical ID can provide quick access to critical medical information, such as allergies, medical conditions, medications, and emergency contacts. Note that while setting up the Medical ID, it is recommended to enable accessing Medical ID from Lock Screen on your iPhone.
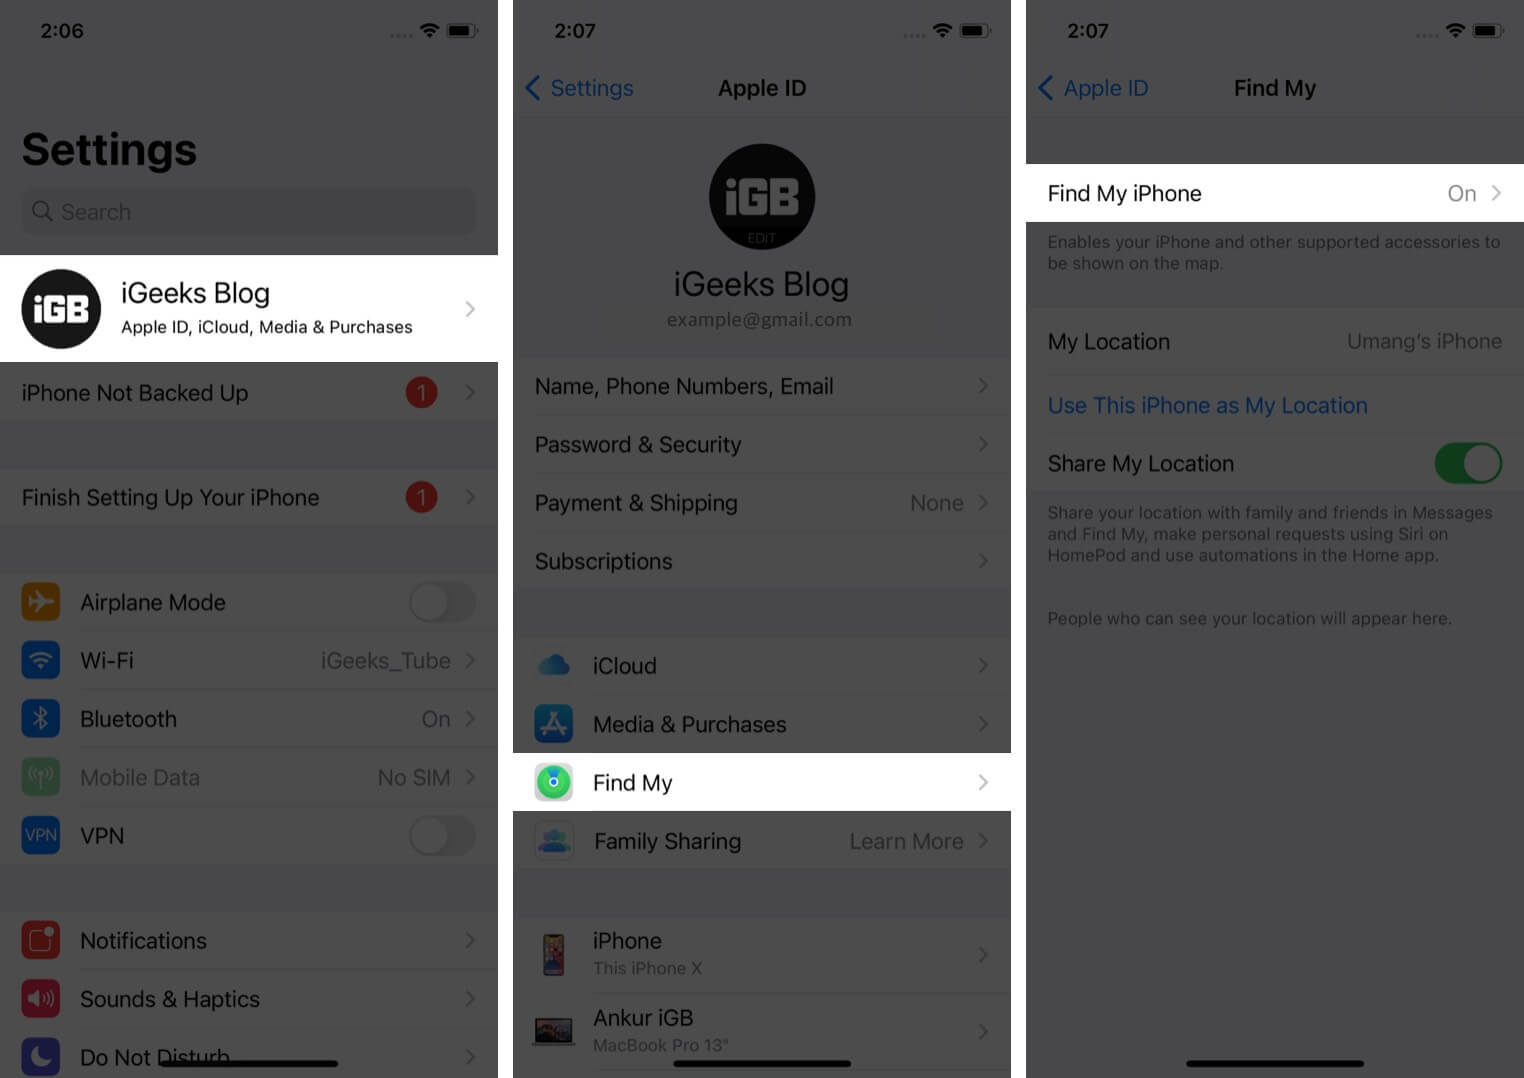
2. Turn on Find My
You must turn on Find My on your iPhone to locate a lost device and protect your data from theft using Activation Lock. Also, you can use it to share your location with family and friends, which can help others to know about your emergency. You may put your device in Lost Mode if you lose your iPhone. It locks your device, displays a message with a phone number where you can be reached, and shows your device’s location on a map.
3. Enable erase data after multiple failed attempts
The auto-erase feature on your iPhone is a simple yet effective way to protect your data if your phone is lost or stolen. It prevents unauthorized access, protects your iPhone from hackers, and ensures your data remains safe and secure. To enable Erase Data after 10 failed attempts:
4. Turn on Lockdown mode
Lockdown Mode on iPhone adds a layer of security to protect against complex digital threats. It increases security, protects your privacy, and prevents unauthorized access to your device. After you enable Lockdown Mode, your device will restrict some apps, websites, and features such as Apple services, Message, FaceTime, Shared Albums, etc. As a result, it will decrease the attack surface and exploitation of highly targeted malware.
5. Use Safety Check
Safety Check on your iPhone is a feature to protect against domestic threats. It disables Find My Network’s location sharing, resets system privacy settings, secures message and FaceTime access, and logs out of your iCloud account. Also, you may perform a privacy audit and check who can see what information, change your passcode and password for your Apple ID, etc. The Emergency Reset option in Safety Check will immediately withdraw permission for anybody, any app, or any data to access your iPhone’s data. Do this if you fear your phone has been hacked or your safety is in danger. If you are more concerned about your privacy, you may use security apps for your iPhone.
6. Use Emergency SOS
The Emergency SOS on your iPhone becomes an essential feature in a potentially life-threatening situation. It provides quick access to emergency services, location tracking, and crucial medical information. So you can receive prompt and appropriate care. You can call 911 or your local emergency number by pressing the side button five times. It also works even if your phone is locked. Also, when you use Emergency SOS, your iPhone will share your location with your emergency contacts. Besides, if you are in a deserted place without network coverage, you may use Emergency SOS via Satellite on your iPhone 14. And if you are facing issues “SOS Only” issue on your iPhone, you can have a look on our article.
7. Encrypt your notes
It’s essential to lock sensitive notes on your iPhone. In iOS 16, you can use your Face ID to encrypt your notes. Previously, there was an option to set a different password rather than your passcode for higher security. But biometric authentication has added convenience along with better security.
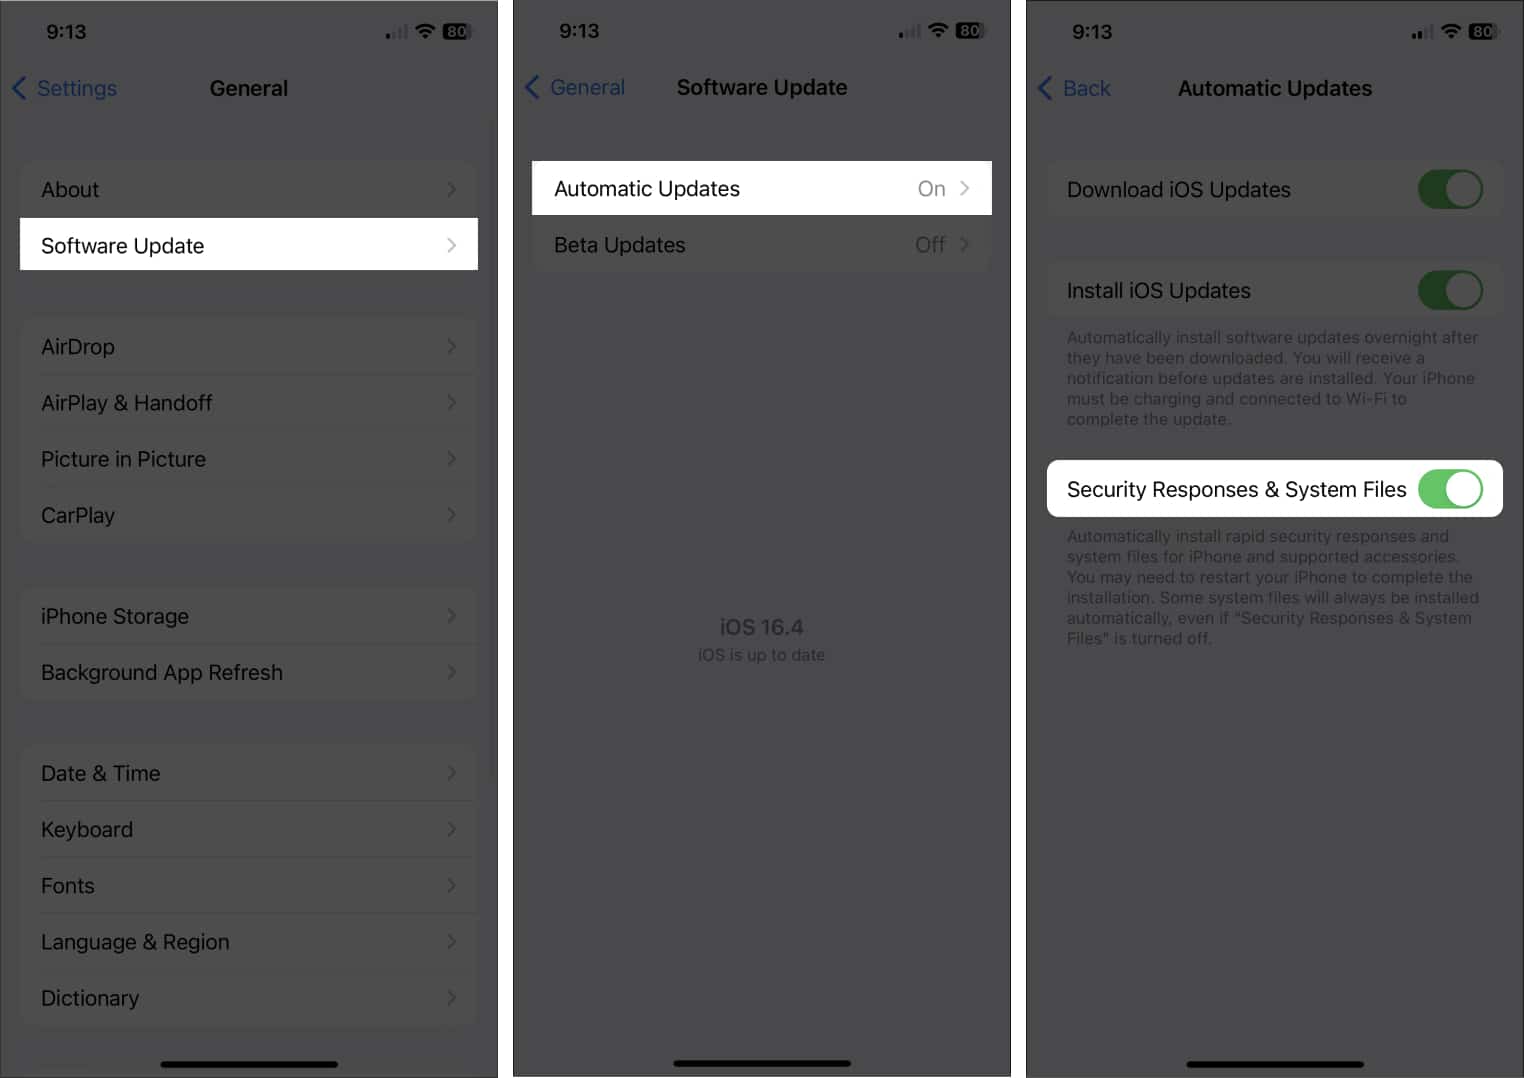
8. Automatically install security updates
Rapid Security Responses is an iOS security patch to protect your iPhone against more severe vulnerabilities. It also fights against susceptible physical peripherals and attackable system files. You may automate the installation of these updates by doing the following:
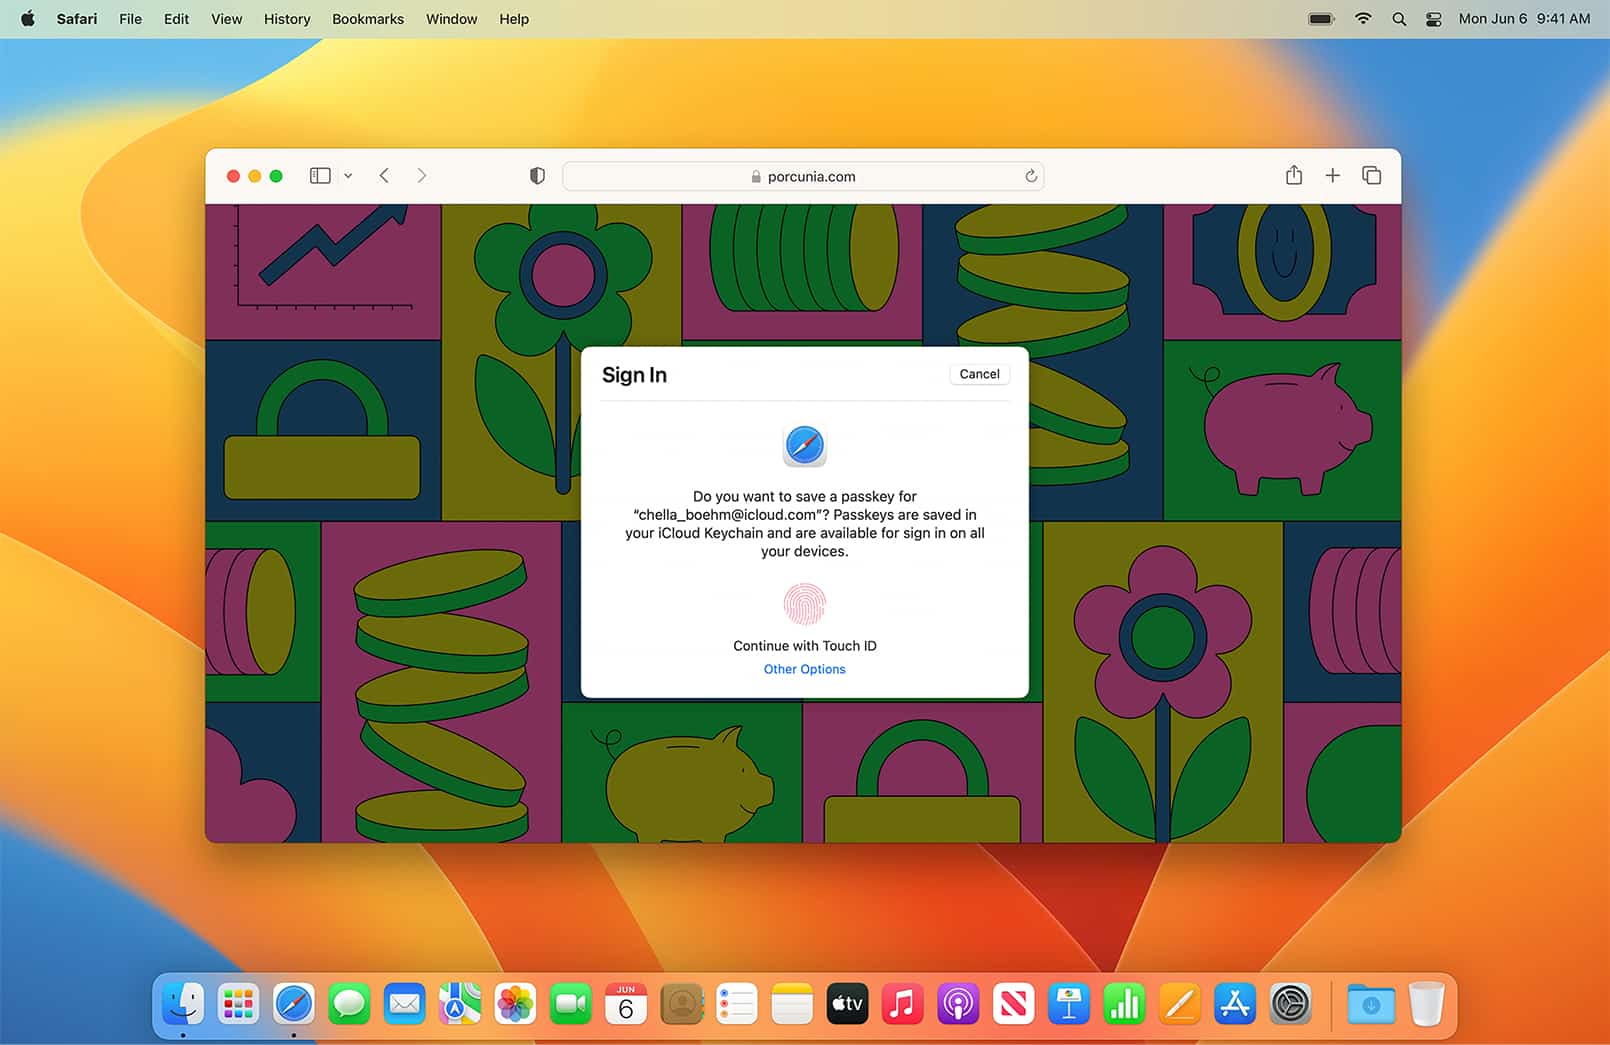
9. Passkeys for apps and websites
Passkeys on iPhone is a password-replacement system to protect against data breaches, phishing scams, and password-cracking assaults. It employs distinct public and private keys for every account. So, if you use this feature, it becomes challenging to break into Passkey-protected accounts since the private key is hidden and needs biometric identification. You can access passkeys from your Apple devices since they sync with iCloud.
10. Security Keys for Apple ID
If you want to take a step further in securing your Apple ID, you must have a security key to sign in to your Apple ID. It stops phishing and unauthorized login attempts. After enabling this feature, when you attempt to sign in on a different device, access your account online, or change your Apple ID password, you will need security keys instead of two-factor verification codes. You may get any security key approved by the FIDO Association, like Yubico or NFC keys. However, always have two keys as a backup if you misplace one.
11. Use Advanced Data Protection for iCloud
To protect your iCloud data, Apple introduced another safety feature called Advanced Data Protection. It provides end-to-end data encryption for voice memos, shortcuts, Safari bookmarks, Wallet passes, notes, images, and reminders. Previously, only a few files and data had this security protocol. I’d highly recommend getting advanced protection.
12. Change AirDrop time limit
AirDrop is excellent for quick file transfer. But you may receive unwanted files from people nearby as you are always. To prevent this, you may choose to receive from only Contacts, or you may keep the feature on for just 10 minutes. Now if you are inactive for 10 minutes, AirDrop will be turned off. You must manually activate AirDrop for persons not on your contacts list.
13. Hide your personal email address
Hide My Email is a safety feature of the iCloud+ service. It lets you create one-of-a-kind, random email addresses forwarded to your email account. Therefore, you can send emails, submit forms, or sign up on websites without revealing your email.
14. Use iCloud Private Relay
With iCloud Private Relay, you may prevent websites from tracking you. It ensures that no one, not even Apple, can know your identity and what websites you view on Safari. Your queries are routed via two distinct, secure internet relays. So, you may browse the internet safely and preserve your privacy. At times, with this feature on, a few websites may not work correctly. Therefore, you may temporarily consider turning off iCloud Private Relay on your iPhone.
15. Hide your IP address
Apple included this iPhone security setting due to the increase in data exploitation and malicious ad networks increase daily. Additionally, while browsing Safari, you may hide your IP address and protect your information from privacy breaches.
16. Control app tracking
According to Apple’s App Tracking Transparency, each website and app must take permission to access your data. You may also change permissions later or stop apps from tracking you on your iPhone. Leverage the emergency and safety features on your iPhone! iPhone security settings can keep your data safe and prepared in an emergency. It’s crucial to keep your iPhone up-to-date and know the security risks of using public Wi-Fi networks or downloading apps from untrusted sources. Do you use any other security features in iOS 16? Let me know in the comments below. I will indeed check! Explore more…
How to change iPhone privacy and security settings How to get rid of fake Apple security alerts on iPhone Apple Watch security features: All you need to keep your privacy intact What is Apple Rapid Security Response update, and how to enable it?


