The steps below apply to all Macs, from desktops like iMac, Mac mini to notebooks like MacBook Air and MacBook Pro. Note: If your Mac has macOS High Sierra or older, you can record the screen using QuickTime Player.
How to record the screen using the Screenshot toolbar Different record settings in the Screenshot toolbar How to trim, share, save, and delete the screen recording Record Mac’s screen using QuickTime Player
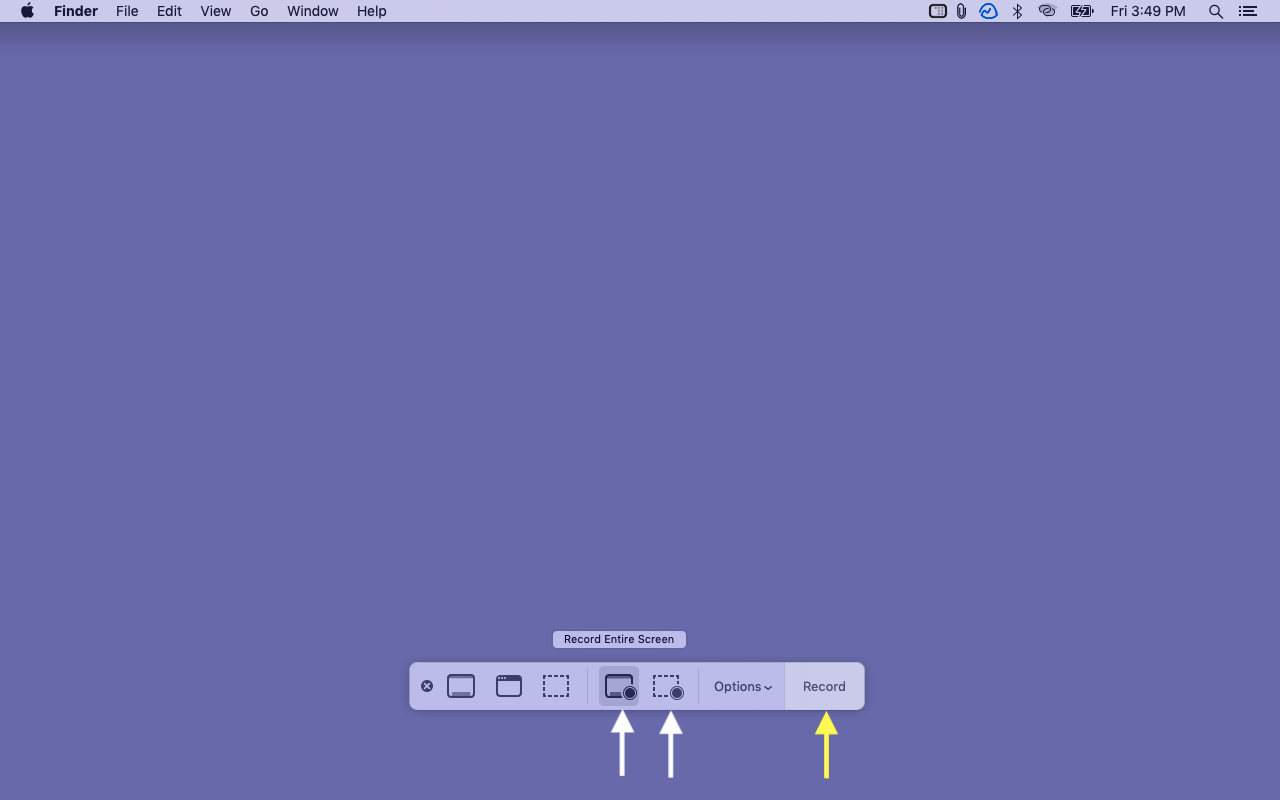
How to record the screen using the Screenshot toolbar
This is how you can quickly record your Mac screen. Now, before seeing the next method, let us talk about the Options in the Screenshot toolbar.
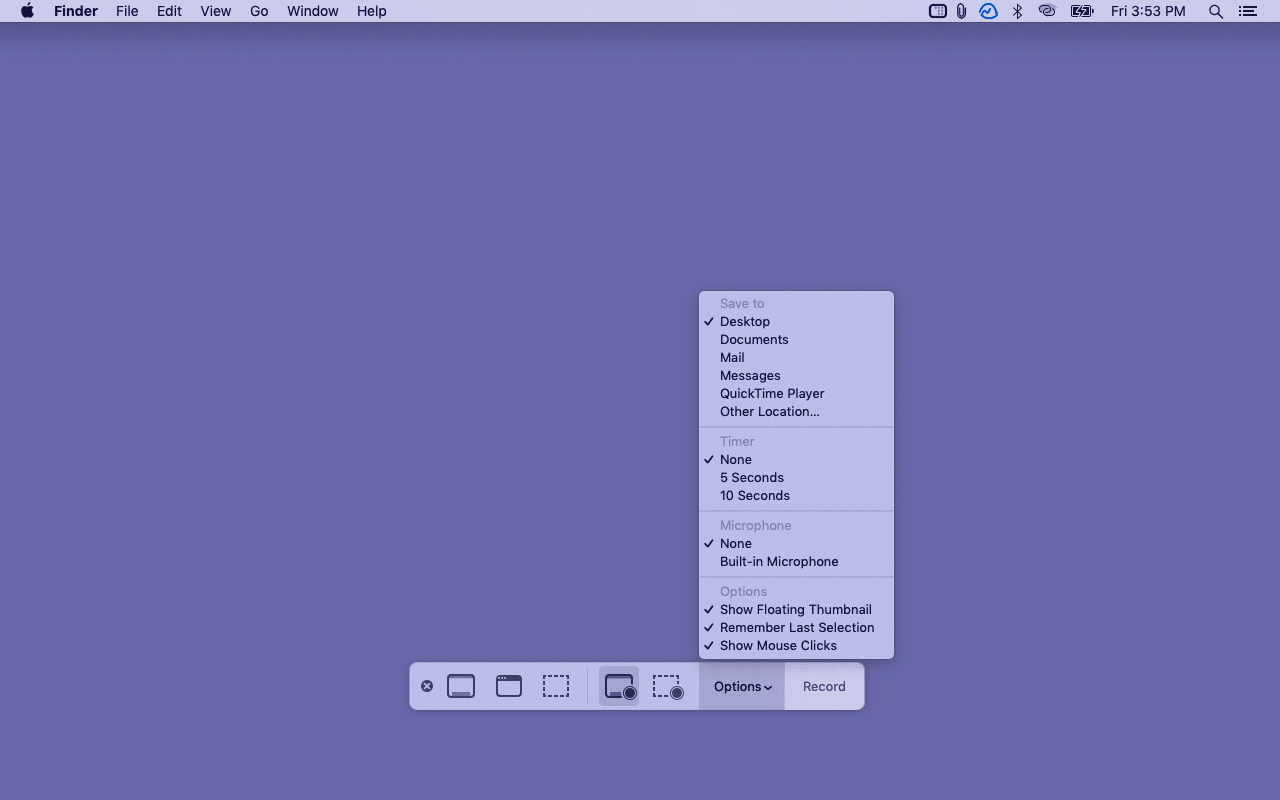
Different record settings in the Screenshot toolbar
When you click Options, it presents you with a few possibilities. These are:
Save to: It lets you choose where you want the final recorded screen video file. Click Other Locations to set a custom location. Timer: I use this often. It lets you set a timer of 5 or 10 seconds. After clicking record, the screen recording will begin after the set timer. Microphone: If you want external sound, select Built-in Microphone (or one of the available mics). Other Options: After taking a screenshot or screen recording, you see a preview thumbnail in the lower right of the screen. If you do not want this, uncheck Show Floating Thumbnail. Remember Last Selection applies the same options the next time you use the Screenshot toolbar. Enabling Show Mouse Clicks will show a round highlight in the screen recording when there is a mouse click.
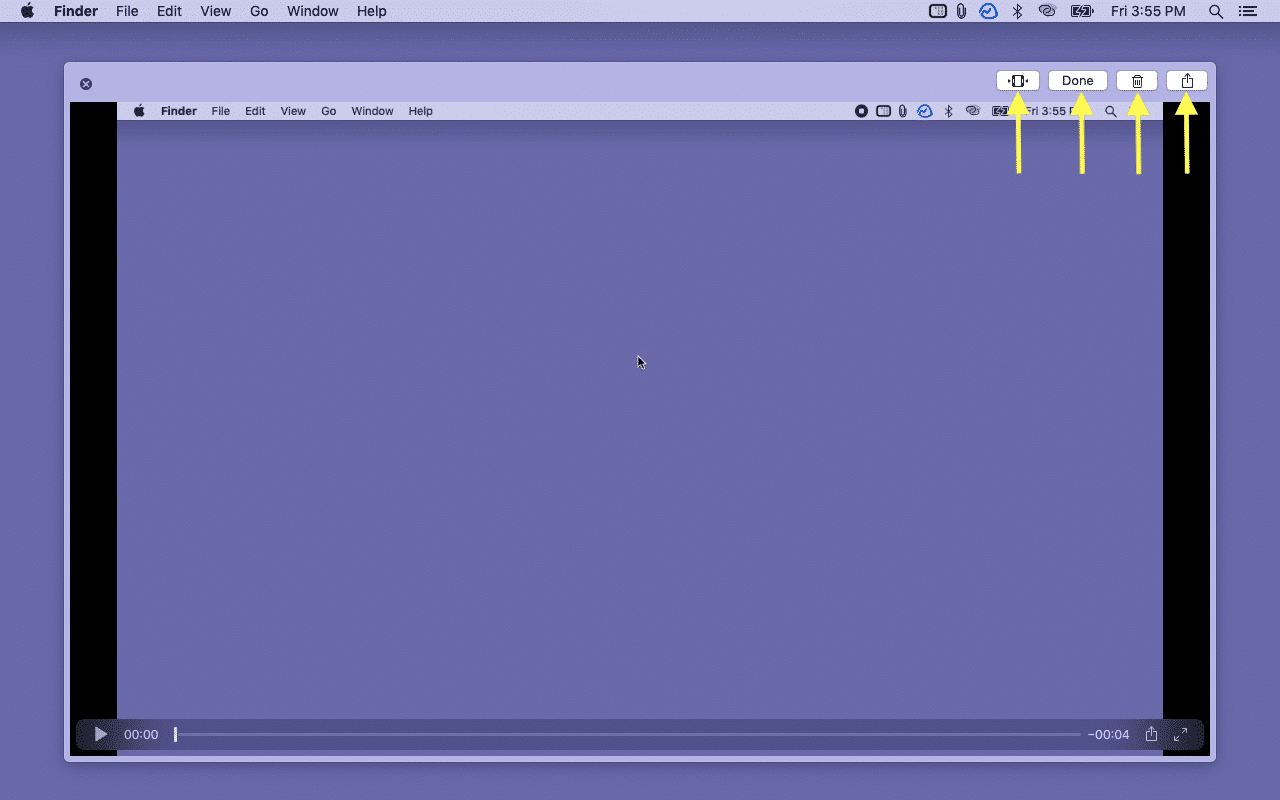
How to trim, share, save, and delete the screen recording
After you stop the screen recording, its thumbnail appears for a few seconds in the lower right. Click it. From here, you can:
Trim the screen recording: Click the left-most icon at the top right. Now, drag the yellow edges and trim the two ends of the video. Save: The file will automatically save when the thumbnail disappears. But if you have clicked the thumbnail, click Done to save it. Share the screen recording: Click the share icon at the top right and choose AirDrop or one of the available options. Delete the screen recording: Click the trash icon.
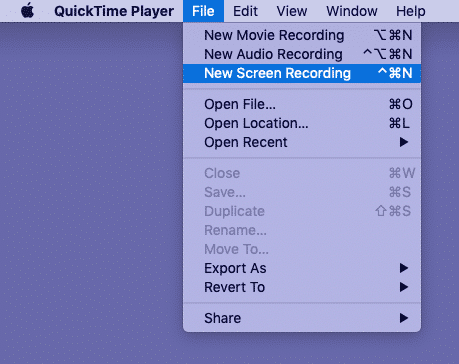
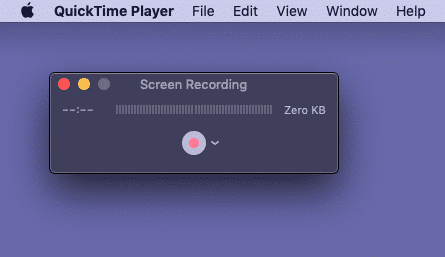
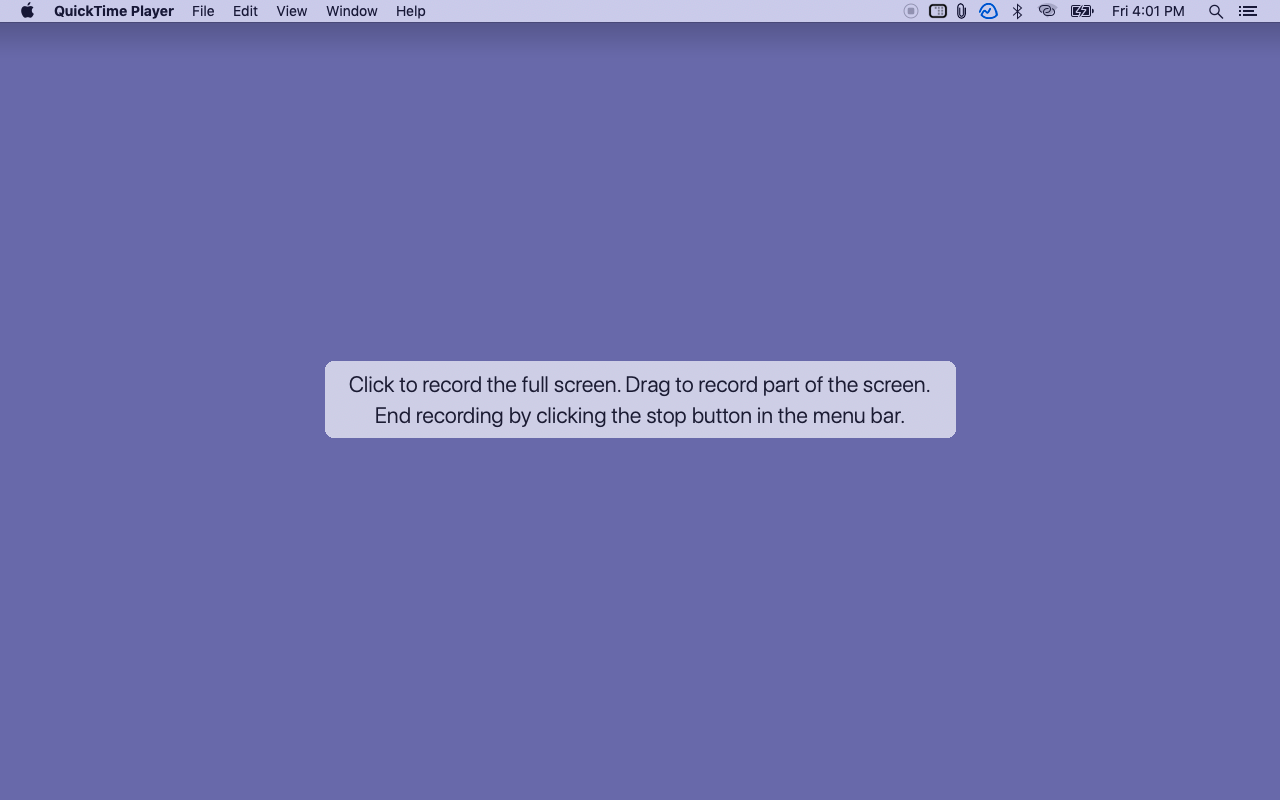
Record Mac’s screen using QuickTime Player
Pro Tip: Your Mac also has a Screenshot app that most people do not know about. If you frequently need to take screenshots or screen recordings, add this app to the Dock. Some handy points:
The automatic name for screen recording is in this format – “Screen Recording date at time.mov.” Screen recording files can be opened in the most video player and editing apps like QuickTime, VLC, iMovie, etc. A few Mac apps may not allow you to record their window. After launching the screen recording tool, press esc if you wish to cancel.
Now, you know how to take screen recordings on your Mac using the inbuilt tools.
Third-party Mac screen recorders,
Camtasia Capto: Screen Capture & Record ScreenFlow OBS Studio
I hope this quick guide on Mac’s screen recording was helpful. If you have additional questions, please ask me via the comments section below. Other interesting posts:
How to take a screenshot on Mac How to take a screenshot on Apple TV using Mac 3 Ways to share your Mac screen with another Mac How to find and delete duplicate files on Mac
![]()

![]()


